Friday, February 21, 2014

Getting Ready: My Daily Makeup Routine (in pictures)

I usually like to try something new when I do my makeup, but here is what I do on a mostly-daily basis!
Start with a clean, moisturized face

Get your prime on! I'm loving the Youth Code Pore Vanisher from L'Oreal

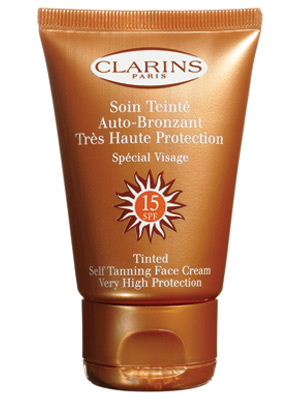
Get out your makeup! I like L'Oreal True Match (I'm in the color N4)
I'm also using a beauty blender to apply


Conceal! I'm using Maybelline Age Rewind in Light

 Here's how I apply:

Blend blend blend!


Next I cover up any blemishes with a healing concealer, I'm using Melvita SOS Imperfections

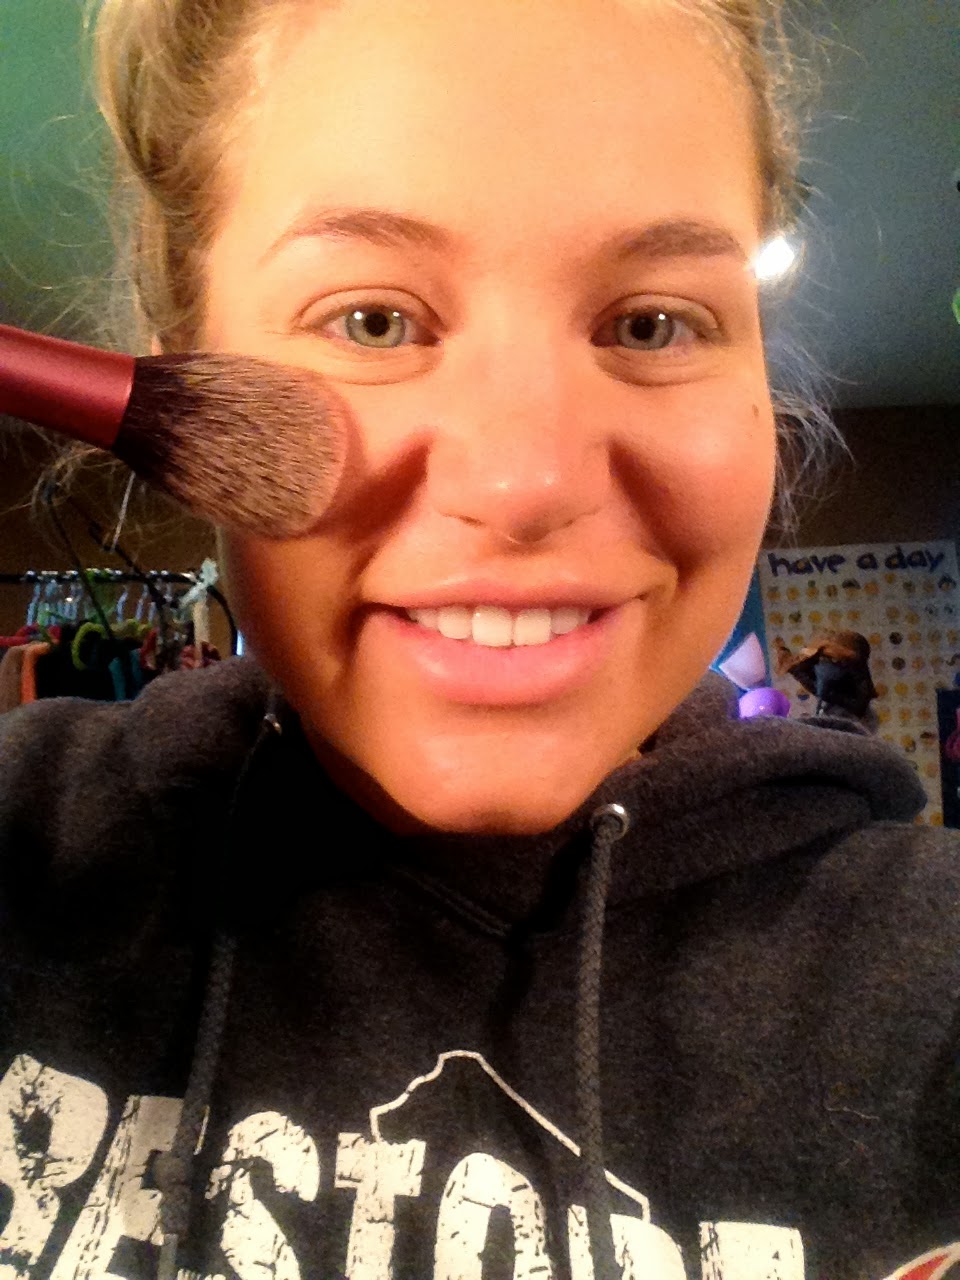
Set your concealer! I'm using ELF's HD Powder

Next I set my face with a power, here I'm using Revlon Colorstay in Medium

Blush time! I use Tarte blush in Dollface with a Real Techniques blush brush


Don't forget your brows! I use Anastasia Brow Powder Duo in Medium Brown

I set my brows with the Anastasia Brow Gel

Time to prime your eyes! I use a Mac Paint Pot which I've had for 3 years now and still have a ton left. The color is Painterly


 Next I take a pencil (I have Rimmel Scandeleyes Kohl Liner in Brown) and draw it onto my eyes and blend out.


I'm using an ELF eye smudging brush but a q-tip works great too!

Do the same to the bottom:

All blended!

Next I line my upper and lower waterlines with the same pencil.

Don't forget to curl your lashes!


For mascara I'm using Covergirl's Flamed Out in Black/Brown


Here I'm just doing another quick sweep with the ELF HD powder incase any makeup fell.

This stuff is AMAZING for chapped lips! Rosebud Salve from Sephora.

This lipstick is Wet and Wild's Bare It All

To set it all I like NYX's Matte Finish Spray 


How to: Make Your Nail Polish Last a Week!

We all don't have the money to get professional manicures regularly and who wants to take the time to do their nails if it's going to chip in a day or two?! I saw a post on pinterest called "DIY Gel Nails" and had to try it, and it definitely works! My nails have been done for a week now and only have signs on wear of the tips. 
Here's what you'll need: 
Any nail polish of your choice (I'm trying out my new one from my Ipsy bag!)
Any top coat of your choice (I'm using Out the Door)
Gelous Advanced Nail Get Coat (I got mine from Sallys)


How to apply:
Apply one coat of Gelous to each nail
Apply one coat of your nail polish
Apply another coat of Gelous
Apply another coat of your nail polish
Apply your top coat
Apply one last coat of Gelous
Done!

Here are my nails after painting them:


And my nails today, 7 days later! You can see the growth and you might be able to see the tips and how they are starting to wear. But they look awesome for a week!


Some additional tips/notes: You don't need to use a high-end nail polish. I've used Wet and Wild and had the same results! Make sure your nails are clean--swipe some nail polish remover even if you don't have nail polish on. Also make sure to buff your nails before so they have a nice smooth surface, I find this really helps!

Happy painting!

Friday, February 14, 2014

My First Ipsy Bag!

Happy Valentine's Day to me!!! I was super excited about joining Ipsy because I love trying out new products and brands! If you're not familiar with Ipsy, they are one of many subscriptions that you pay for monthly (and can cancel whenever!) and you get sent a box of new products to try, usually full size or deluxe samples! I chose Ipsy over other big names like Birchbox because when you sign up they give you a quiz so they know which products you would want to try over others! They are $10 a month and the items you receive usually add up to way more than that!

Heres the link if you want to try it out! Definitely worth it! So here's what I got!


The bag it ships in, super cute!

Inside the makeup bag!
Everything! It all comes in a pink makeup bag!
From left to right:
Pacifica Hawaiian Body Butter 2.5 oz (retails for $7)
Zoya Nail Polish in "Odette" (retails for $9)
Tini Beauty Eye Shadow + Base in "Spiced Rum" (retails for $18)
J. Cat Eyelashes (retails for $3.99)
Pop Beauty Plump Pout Mini in "Fuchsia Freesia" (retails for $16)
Totaling $53.99 worth of product for $10!!!
Swatches of "Fuchsia Freesia" and "Spiced Rum"
FYI I tried washing my hand off after and the eye shadow did not budge!


Overall I am very happy with my first glam bag! I am very excited to try all of these products out! I am not a lash person but they could definitely come in handy. The nail polish is a perfect color for Valentine's Day and I think it calls for another blog of showing you guys how to make your nail polish last! Time to paint!!

Til next time! :-*


New Obsession: L'Oreal Youth Code!!

I know there has been a lot of hype about the new L'Oreal Youth Code line, and I'm here to tell you it's definitely worth it! Goodbye big pores!


So I was originally only going to get the Texture Perfector Serum but then I splurged and got the other two. Oops. Sorry bank account. So I need to tell you--it is amazing. All of them are. After washing your face you apply the serum (middle), and instantly I saw a change in my skin! It looked very smooth and my pores appeared smaller. The next step is to apply the day/night cream (left) which claims to make your skin "velvety smooth" and it definitely lives up to that. I've heard that those two combined have made some people's skin have drastic changes after about a month of using it which I am very excited for! The next step would be the pore vanishing cream (right) which I only use a primer so I only apply it in the morning. If you thought your pores looked small before, wait until you try this! My makeup has never looked so smooth before.

I'm telling you these are definitely worth the semi-high price tag. They are about $20 each--but hard to find! I tried to get them where I work (a popular drugstore) so I could use my employee discount and it was marked $24.99 there (and they only had the serum!). I tried Ulta next and they only had the serum and it was on sale for $21.49. Target ended up being the cheapest and had all of them in stock for $19.99! Definitely shop around first and search the web for coupons!

Have you tried these yet? Let me know!

Monday, February 10, 2014

Self Tanners: Hits and Misses

I don't know about you but I looooooooove being tan! I hate my skin when it's pale because my undertones are extremely red and it's just not a pretty site. And I also don't want to premature age my skin or put myself at risk for cancer---so my only option is to self tan! And I've narrowed down my favorite and no-so-favorite tanners!

The Misses:

I know this is supposed to be an amazing product--but it definitely is not for me! The product comes out yellow-y and I honestly did not see a difference in my skin color. At all. Which is not okay.


This is another product I had high hopes for! The product itself was okay but it made me very orange.

The Hits:
    
Million Dollar Tan is one of my all time favorites! I use the extreme versions, the spray for my body and the pump face lotion. The spray comes out in a dark olive-brown color which I love because I can see where I applied it. The face lotion is white but is very easy to apply and gives you a brown tan--no orange here! I've used the spray on my face and had no problems with breakouts but it does fade a lot faster on my face as opposed to the lotion version. Love love love!! I use the spray on my body about twice a week and the face once a week! And I always get asked "are you naturally that dark?" "did you just go on vacation?" So you know it is natural looking!
This is also tied for first place as one of my favorites. It is a dark lotion that is an olivey-green/brown color which results in a dark natural brown tan color. I have the darkest color they have and have used it on my body and face and had no problems with breakouts! I have nothing bad to say about it!!


My Self-Tanning Tips:
--> Take a quick shower before you apply your self tanner. Do a thorough exfoliation and lotion beforehand, it makes a LOT of difference!
--> I recommend tanning at night. You should leave the tanner on for about 6-8 hours before coming in contact with any water or sweat, so what better time to do it than before bed!
--> If the self tanner leaves you feeling a little "sticky", wait a few minutes to let it dry then sprinkle on some baby powder wherever you are feeling sticky. The baby powder takes the feeling away and doesn't disturb the tan at all!
--> Lotion after every shower. It keeps your tan on for longer!
--> Since we wash our face most often, try to limit exfoliating if you want to preserve your tan. Or, exfoliate all you want and mix in your face-tanner with a little moisturizer to keep on glowin'!
--> If the tanner is too dark for you, tone it down by mixing it with body lotion. This also works with sprays!

Saturday, February 8, 2014

Going No Poo!

Okay I know what some are you are thinking. Why is she talking about poop?!

No! I'm talking about no longer using shampoo or conditioner. There are hundreds of websites and blogs dedicated to the no poo idea so let me sum it up for you: shampoo is a detergent, stripping your hair of all of the oil in it. Since your scalp is now stripped, it freaks out and produces more than needed to compensate, causing you to need to wash your hair again because it's oily. So basically, all of the chemicals in your shampoo is just tricking your scalp to produce more oil, causing you to wash more, thus needing more shampoo. It's a vicious cycle, really!

So how do you clean your hair without all of these chemicals--without shampoo! The answer will only cost you pennies per wash, literally. The "shampoo" will be baking soda mixed with water, and the "conditioner" is vinegar with water. And no, you won't smell like a salad after and no, your hair won't become a first-grade science fair volcano.

How it works: the baking soda removes the excess gunk from your hair but doesn't strip it. In effect, your scalp doesn't produce excess oil and you can go way longer between washes then you probably ever imagined. I've read people that only wash their hair once a week! A dream come true for my super long super thick hair!

How to wash: mix 1 tablespoon baking soda into 8 oz warm water (I find warm water dissolves the baking soda better) into a bottle. I bought two at my local Sally's (here's the link). In the second bottle mix 1 tablespoon vinegar (I use apple cider) into 8 oz water. Before showering brush your hair to distribute the natural oils from your scalp to the length of your hair. I find it's easiest to first brush regularly to remove tangles then use a boar bristle brush to really distribute the oils. In the shower, massage your scalp with water, shake up your "shampoo" and apply to your roots only! This works best when you wait for the baking soda to do its work. I clip my hair up and finish doing my other shower duties. Don't rinse out your baking soda mix until your roots feel slimy. This is key! It means the baking soda is breaking down everything. Rinse out well and then apply the vinegar mix only to the length of your hair. I comb it out then rinse--again rinse well!!

After reading this you'd probably think I've been doing this for months. Nope! I've just done a LOT of research and finally tried it last night. My hair did not smell like vinegar--or anything for that matter. If you can't stand the smell of the vinegar try putting in a few drops of essential oils into the vinegar mix. 

To sum it up:

PROS:
-Less hair washing
-Healthier scalp
-No chemicals
-VERY inexpensive
-Overall healthier/shiner hair

CONS:
-There is a "transition period" where your hair adjusts to this new method and can leave you with greasy hair. The length of time it lasts depends on how long you wait between washing your hair currently and if your hair produces a lot of oil. Oily hair and everyday washers will probably have a longer transition period than every 2-3 day washers with normal/dry hair.
-The beginning can leave you with knotty hair.

So here is my hair after towel drying after my first "wash". I did it at night because I wanted to air dry my hair and that usually takes hours (my hair is VERY long and VERY thick).

An update will be coming soon! Let me know if you have any questions!

Friday, February 7, 2014

Review: Maybelline Baby Skin Pore Eraser

Hello again! Today I'm going to review the newly popular Maybelline Baby Skin Pore Eraser. 
What it claims to do: Has insta-blur technology to visibly smooth pores.

My before (left) and after (right):


It is probably hard to tell from the pictures, but I do have my fair share of large pores! 


My thoughts: Does it work? Kind of. Would I recommend? Maybe. If you don't have as many or as large of pores as I do, then I think that this would definitely work better for you! The price? I paid about $6 for it which isn't bad for a primer. It feels very silicone-y and slippery when you apply it--which made me worried because I am a very oily person! It did provide a nice base for the rest of my makeup.

Overall rating? 6/10.
What do you guys think? Have you tried it yet?
Let me know!

First blog!


Hello there! 

Welcome to my blog. I've been wanting to start one for the longest time and had some spare time today...and here we are! I'm going to make my blogs about anything and everything related to beauty and skincare: reviews, tutorials, swatches. Since I'm a student on a budget, most things I'll be posting about will be drugstore items and not things I need to spend my entire paycheck on!

Stay tuned!! :-*